
Kodi
How to use IPTV Service on Knsure that you are using KODI v15 (Isengard) or above. The Stalker PVR add on is included as part
of
the package. If you are using OpenELEC, use version 6.0.1 or above.
1)
Install and launch KODI
2) Select System:
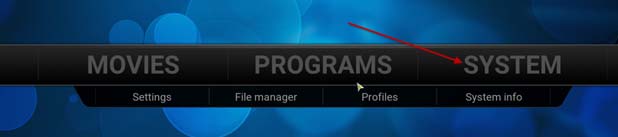
3)
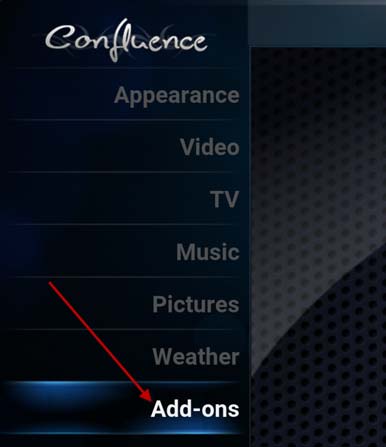
select Add‐Ons:
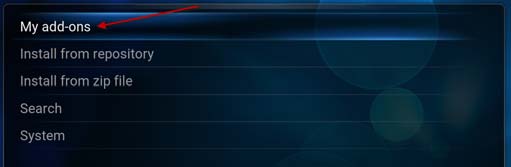
3)
Select My Add‐Ons:
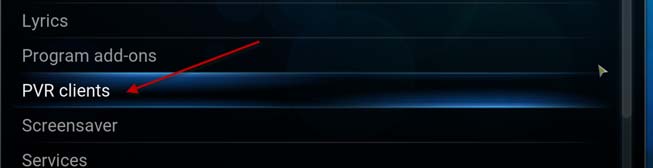
4)
Select PVR Clients:
5)
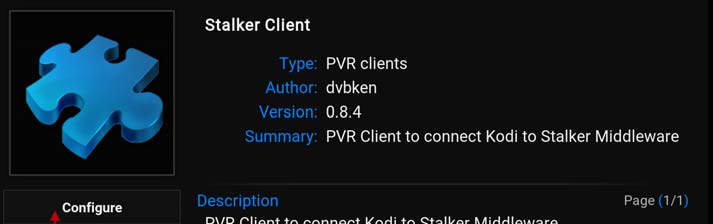
Select the Stalker Client

6)
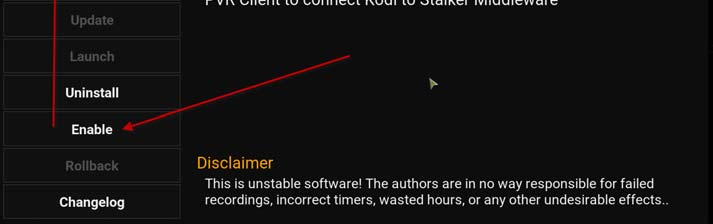
Enable the Stalker Client Add‐On, then select Configure:
7)
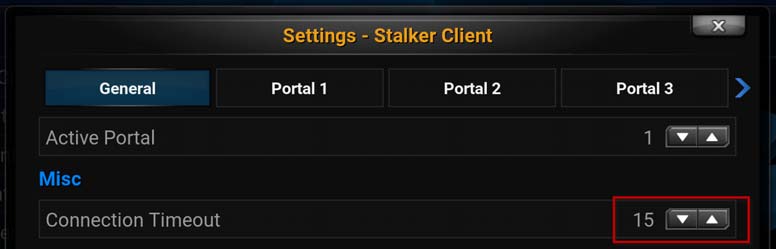
In the General tab, set Active Portal=1 (default) and set Timeout to maximum value (15):
8)
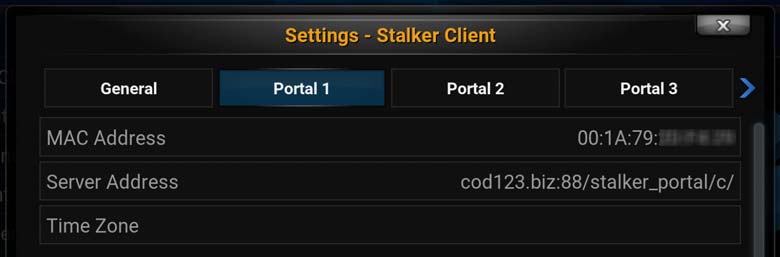
Select the Portal 1 tab, then enter following values. You need to enter
the MAC Address that
you
provided when completing your account confirmation. Server Address is
cod123.biz:88/stalker_portal/c/
(no http or www). For Time Zone, enter using following schema:
Continent/City (ex. America/Toronto):
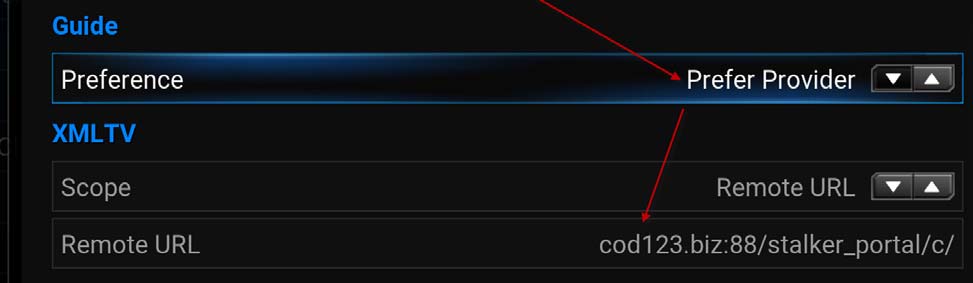
9)
In the same tab, scroll down and select Prefer Provider as preference,
select Remote URL as
Scope,
and enter the same address as above for Remote URL,
cod123.biz:88/stalker_portal/c/ (no http
or www).
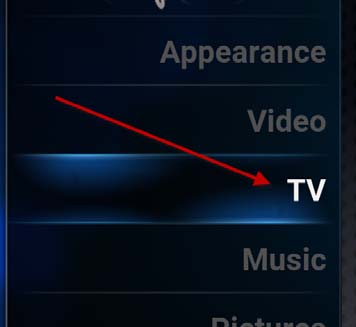
10) Exit from the Stalker Client Add‐On, then select TV in the settings panel:
11)
Under the General tab, select Enabled to activate the Stalker PVR. Unclick
Disable “Connection
Lost”
warnings, and select Synchronize channel groups with backend(s). Once you click
on Enabled, a
dialog
box should appear to show that the TV channels are loading. If nothing happens,
re‐verify
the
MAC address you entered in the Stalker Client Add‐On and re‐verify the
URL.


12)
All other settings in TV are optional. Depending on what channels you want to
keep in your
channel
list, it is recommended that you manage them via the Group Manager (managing
them via the
Channel
Manager does not work well). The Stalker Client has an annoying habit of re‐ creating the
default
groups every time you launch the PVR, so if you want to create a stable list of
channels,
do
the following: Unselect Synchronise Groups with Backend(s). Click on Group
Manager in the
General
tab, then delete all groups except for the ‘All channels’ group, then click on
the channels
in
the Visible TV channels column to remove the ones you do not want to keep. Make
sure you click
on
OK when you are done. If you make a mistake and want to re‐add a Hidden TV channel, just click
on
it in that column and it will be re‐added.


Your shopping cart is empty!
